Ice hockey: district administrator
For district and federation administrators in Norwegian ice hockey: create playing dates, connect teams, create the matches and add new district administrators.
For other roles
This guide is for district administrators and federation administrators in Norwegian ice hockey who set up play days in Profixio. It takes you through the four things you do:
- Create the playing dates.
- Connect the teams to each playing date.
- Create the matches.
- Add new district administrators.
The first three happen in order on one page in the tournament, for one class at a time. Each playing date belongs to one class and has its own name and date.
As a district administrator you have administrator access to the tournaments your district administers.
- In the side menu, open Tournaments / Federations, find the tournament and open it.
- Open Match Schedule and then Forming - Simplified in the side menu.
- The page opens with the heading Distribution of teams pr day and three tabs: Date, Team distribution and Scheduling.
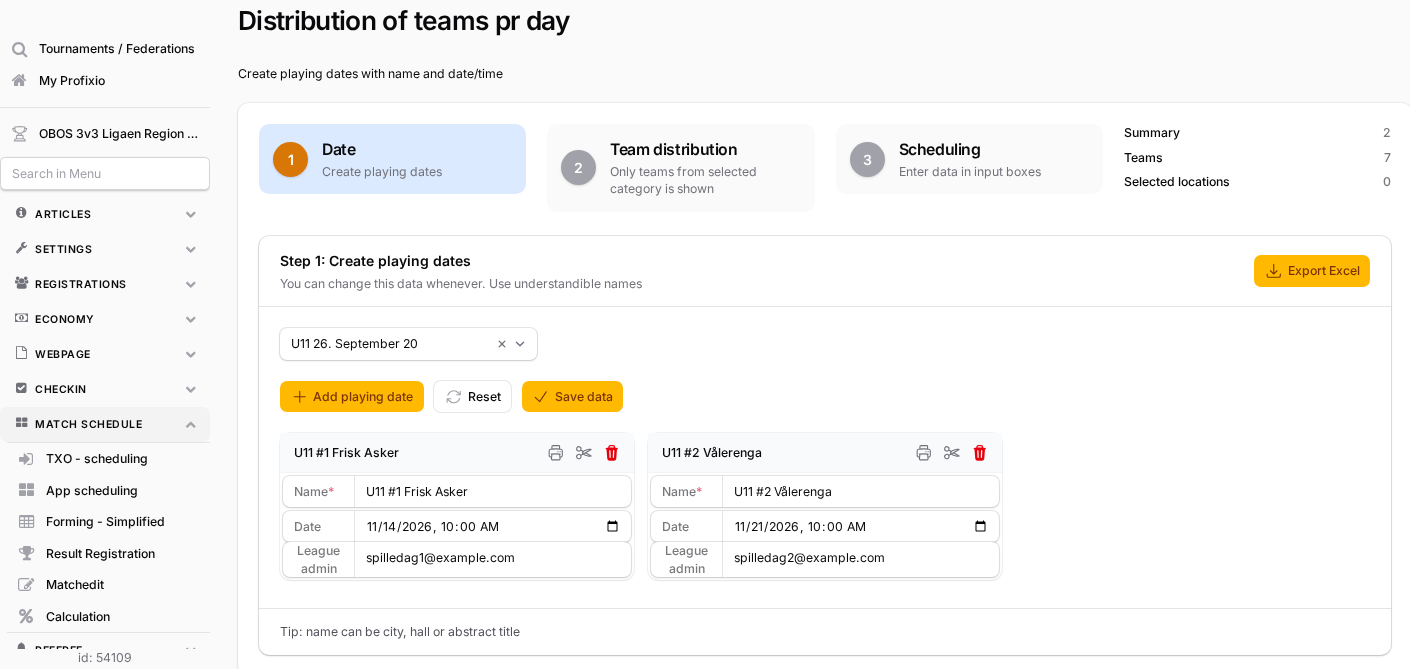
Forming - Simplified is in the menu when Use simplified scheduling is turned on under Settings → Main settings in the tournament.
You move between the tabs by clicking them.
You do this on the Date tab.
- Choose the class under Select level. The field is locked when the tournament has only one class.
- Press Add playing date once for each playing date.
- Fill in Name in the form class, #number and club, for example JU10 #1 Vålerenga. The name is required.
- Set Date with a start time of 08:00 or later.
- Press Save data. If a playing date cannot be saved, a message names it.
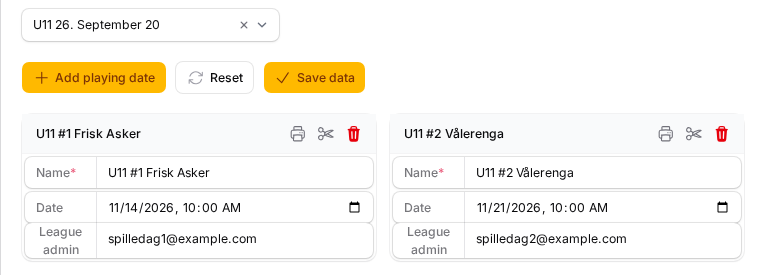
Reset brings back what was last saved. You can change the name and date of a playing date later.
Deleting a playing date also removes its team connections and matches. If a match already has a result, the playing date stays.
Each playing date has a League admin field for the e-mail address of the person responsible for the day.
When the name follows the form above, Profixio suggests a team leader from the host club's teams in the class the next time you open the class.
Check the address and press Save data. You can type another address or clear the field at any time.
When you save a new person, that person gets an e-mail about the playing date. If the e-mail cannot be sent, a message tells you.
What the person does next is described on the page Ishockey - Ansvarlig for spilledag.
- Click the Team distribution tab. The playing dates are saved when you leave the Date tab.
- The grid shows the teams in the class as rows and the playing dates as columns.
- Tick the box where a team plays. A team can be ticked on one playing date per day.
- Press Save before you leave the tab.
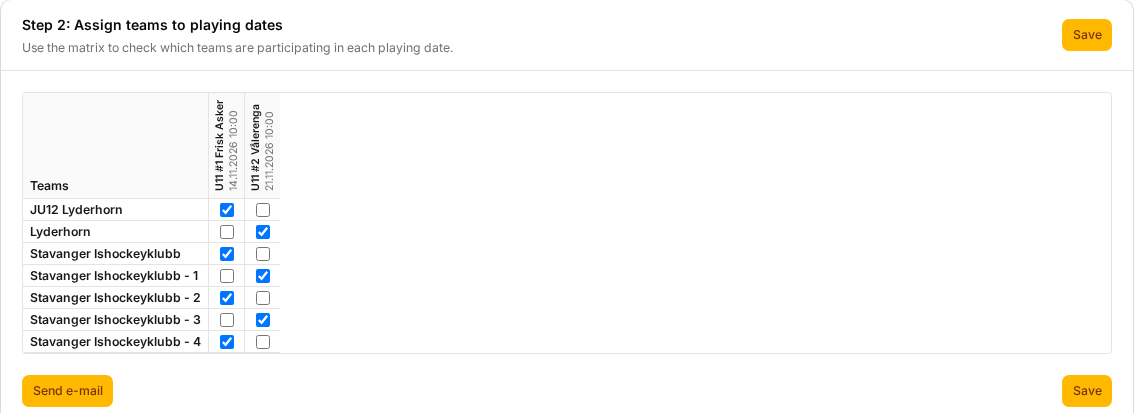
To move a team, untick it on the old playing date, tick it on the new one and press Save. A team that has a match with a result stays on that playing date.
Split in two on a saved playing date with a date creates a second one with the same date and venue settings. Then tick each team into one of the two.
Send e-mail sends the overview as a PDF to the team administrators in the class. Check PDF file shows the PDF first, and you can edit the message before you press Send.
You do this on the Scheduling tab, one playing date at a time. Each row is one playing date with a date from today onwards.
- Num teams is filled in from the teams you ticked.
- Fill in either Num matches (team) or Num series pr team. Filling in one clears the other. With Num series pr team at 1, everybody meets everybody once.
- Open the row with the arrow at the end of the row.
- Fill in Match length (minutes), Match pause (min), Num venues and Arena. Match length (minutes) is already filled in if the class has a match length. Arena lists the tournament's arenas and the federation's register of arenas.
- Press Prepare schedule. The button is active when every setting has a value.

- Check Play date, Match start and Match end time. When the match length is set and the arena already has the courts you asked for, a note shows how many matches there is room for.
- Check that the teams are right and that the box on the group is ticked.
- Press Make matches. The window shows the progress, and Stop and use best result ends the run with the best schedule so far.
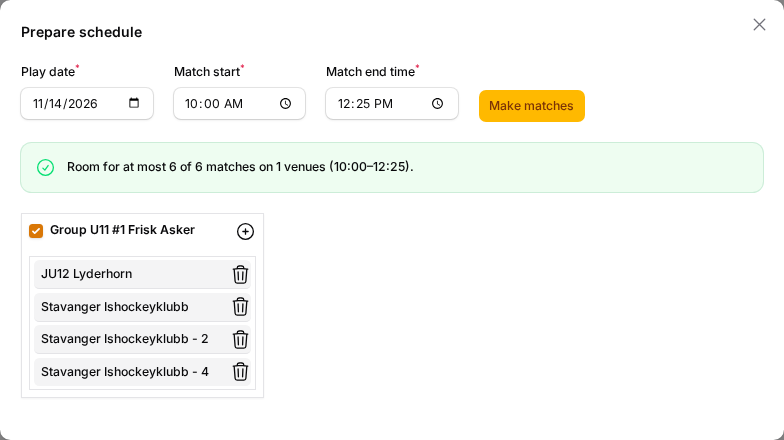
When the run is done, the match list opens at that date and arena. Matches there was no room for are saved without a time or court, and you get a message with the number.
All the options for scheduling are described on the page Generating and scheduling matches.
New matches from Forming - Simplified are hidden until you show them.
- Check the matches on the match list.
- Press the button at the top of the list that shows the number of hidden matches, for example 6 matches hidden.
- Confirm. With no matches selected, all hidden matches in the tournament are shown. With matches selected, the selected ones are shown.

The person responsible for a playing date can also withdraw teams before the day starts, make a new schedule with the same courts, and publish and send it to the teams in the group.
You can add district administrators when you are marked as District Main Admin in the district.
- Check that you are in your district role. See Switching between your roles on the page Federations, districts, sports and other base data.
- In the side menu, open Admin and then Regions.
- Open your district.
- Go to the District admin users tab.

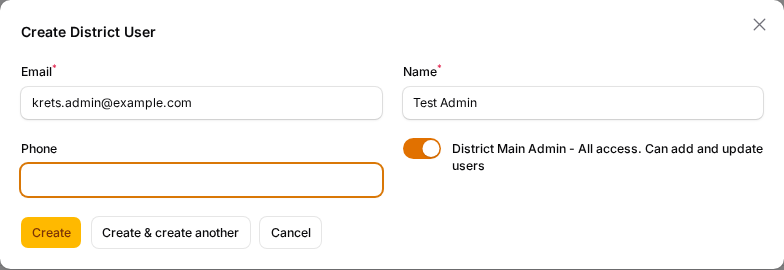
- Press New District user.
- Fill in Email.
- Fill in Name and Phone if they are empty.
- Turn on District Main Admin - All access. Can add and update users if the person should be able to add other administrators too.
- Press Create.
Tell the person they have been added, and that they sign in with exactly this address. If they have no password yet, they use the forgotten-password link.
If the District admin users tab is missing, ask a District Main Admin in your district or your federation's user administrator.
Federation administrators use the same steps for the tournaments the federation owns, while they are in their federation role.
A federation user marked as User Admin can add administrators to any district in the federation, with the steps in Task 4.
Was this page helpful?