Reading and filtering the schedule
What the colour codes, lines and corner symbols in the Scheduler's visualizer mean, how to narrow the view with the visualizer filter and the match filter for very large schedules, how to search for matches, and how match numbers are assigned.
Looking for something else? Publishing the schedule, e-mail and SMS
The visualizer is the schedule view in the Scheduler where matches are laid out per field and time. When you click on a match, the visualizer changes a bit so you get an easier view of your schedule. As always, you need to understand the symbols, so this page explains the colour codes, lines and corner symbols the visualizer uses.
The page also covers two ways to narrow what the visualizer shows (the visualizer filter and the match filter for very large schedules), how to search for matches, and how match numbers are assigned.
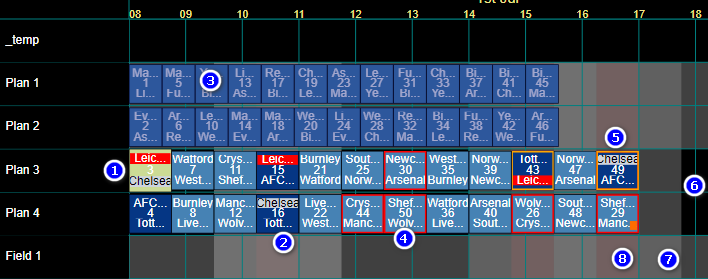
When you click on a match it becomes the active match, and the visualizer colours the rest of the schedule relative to it:
- Group play matches are dark blue, so you can easily see the matches in the same group as the match you have double-clicked on. When you single-click on a match, all matches in other categories become less visible.
- When a match is active (you have clicked on it), you see the two teams in the match as a red and a white rectangle, and you can see where those teams are playing further on.
- All matches in the other categories are blurred.
- A red rectangle around a match marks a match that was recently changed. This makes it easy to know which matches have been moved.
- A yellow/brown rectangle marks matches in the same round as the match you have made active. Matches in the same round can always be played at the same time.
- The black area shows where you can move the active match without breaking any restrictions or field availability, and without placing matches too close to each other.
- The light grey area shows that the field is not allowed for this match.
- The red area tells you that one or both teams in the match would have a collision there.
Double-click outside a match (on the black background) to remove the colouring from the visualizer.
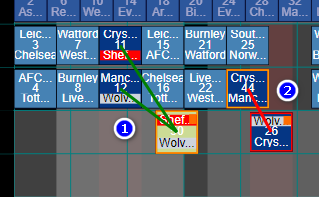
- If teams play nearer to each other than the parameter "Number of matches break" allows, the matches get a green line between them. In the screenshot, both Sheffield and Wolves play with less than one match break. The break is set per category from the "Basic data" menu.
- If teams have a collision, the matches get a red line between them. In the screenshot, Crystal Palace has a collision.
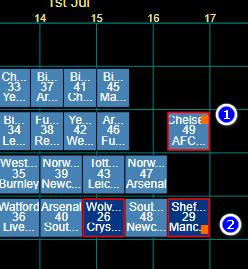
- If a match is placed on a wrong field, it gets an orange symbol in the top right corner.
- If a match has a restriction (in the screenshot, Sheffield cannot play after 15:00), it gets an orange symbol in the bottom right corner.
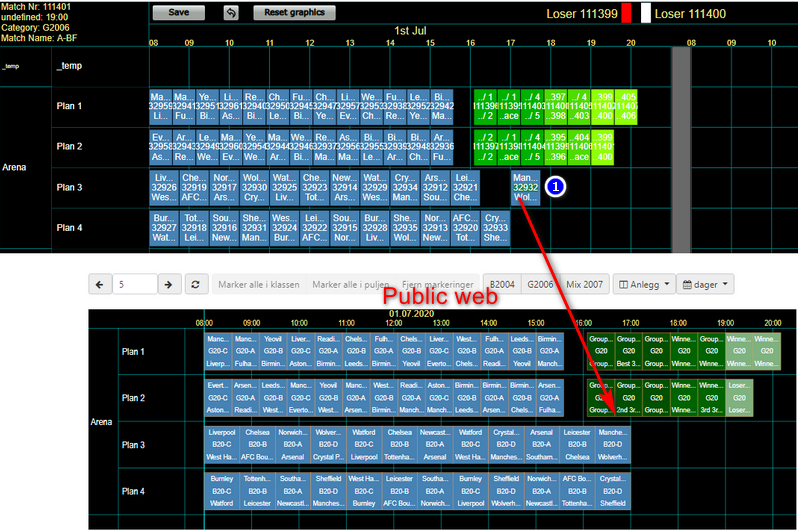
Matches that are different on the public web from what is in TXO have their match number shown on a green background.
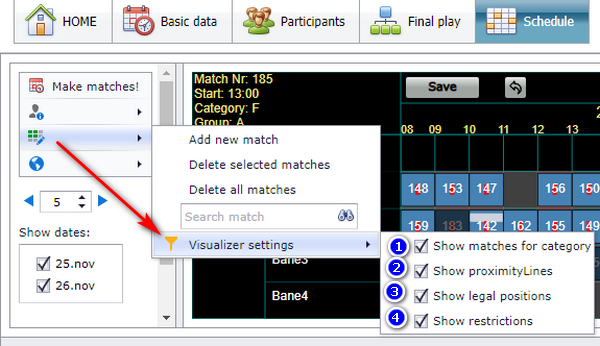
You can turn off the colour code system for categories in the visualizer settings shown in the screenshot.
A visualizer filter limits which fields and dates the visualizer shows, which gives you much more control over your schedule because it is easier to get an overview.
- Filters are shared among all users in your tournament.
- Filters do not influence performance.
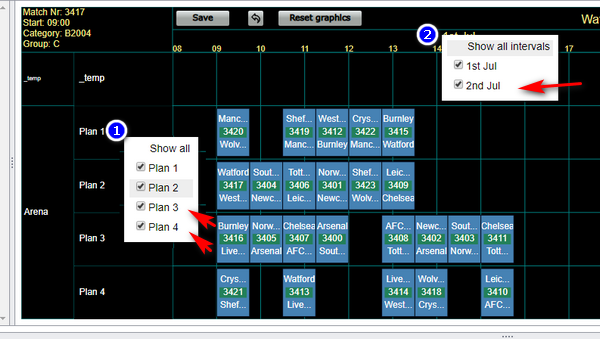
- First, set up the visualizer the way you want it with fields...
- ...and/or with dates. In this example the filter shows only Plan 1, Plan 2 and 1 July.
- Open the menu "Show visualizer filter".
- Click the save button to save the active filter. From then on, this filter shows up in the filter list, ready to activate.
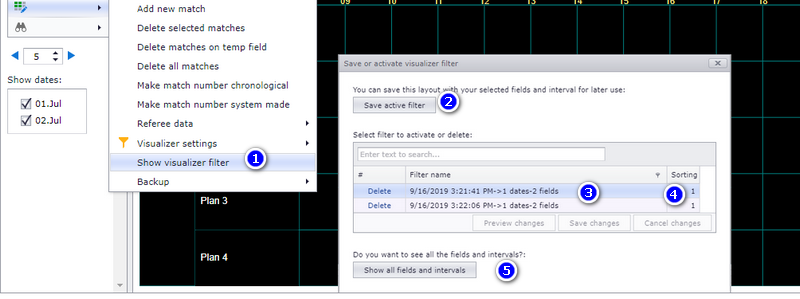
- Open the menu "Show visualizer filter".
- Click on a filter in the list and the visualizer previews that filter.
- In the same window you can edit the filter name and sort the filters.
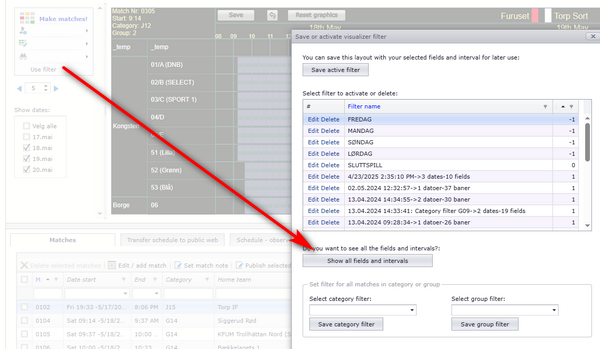
- The reset option shows all fields and intervals again.
The numbered items match the numbers in the "Show visualizer filter" screenshot under "Preparing and saving a visualizer filter".
If you have a schedule with more than 800 matches, some functions slow down the match scheduling. In that case, use "Match filter", which loads only part of the schedule into TXO.
- Select which dates you want to include in the filter (untick the dates you do not want to see).
- Right-click on the facility area and untick the facilities you do not want to include.
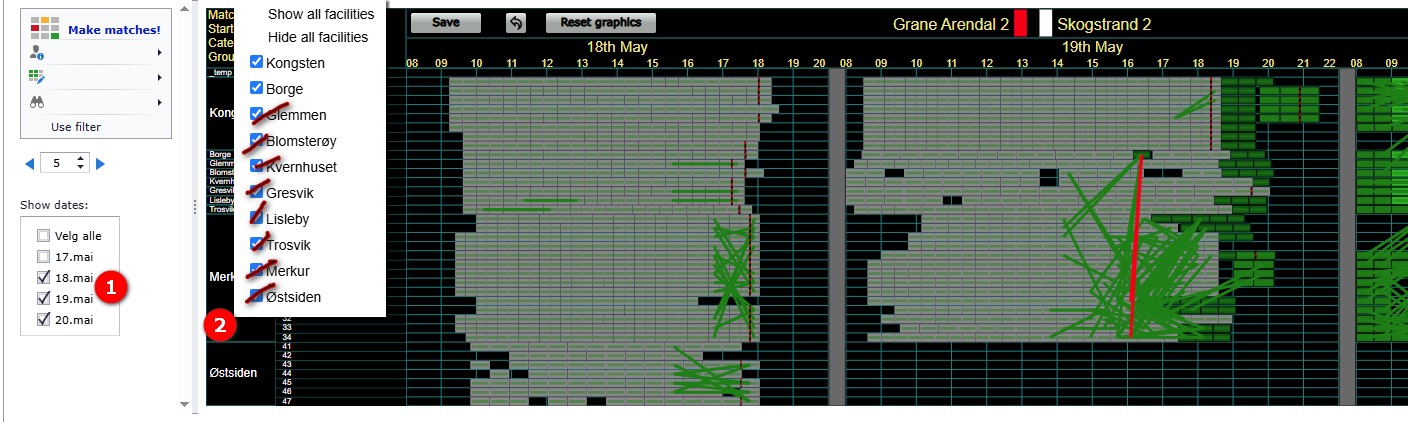
- After selecting dates and/or facilities, click "Use filter" and then "Save active filter". From now on, only the data belonging to the matches in your filter is loaded into TXO, which makes TXO run much faster.
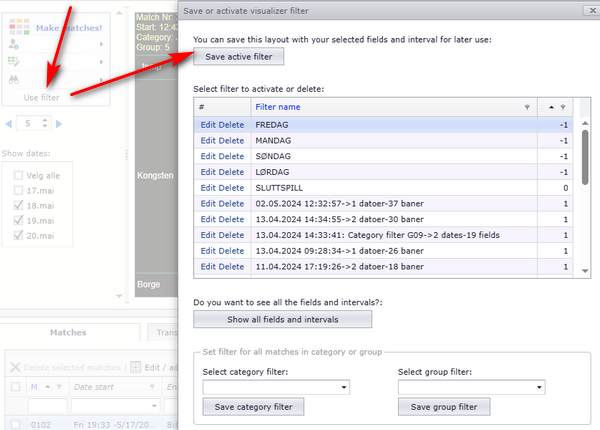
To load all your matches into the schedule again, delete the active filter as shown in the screenshot.
When matches are selected, you can move them, delete them, get contact info and more by right-clicking one of the selected matches.
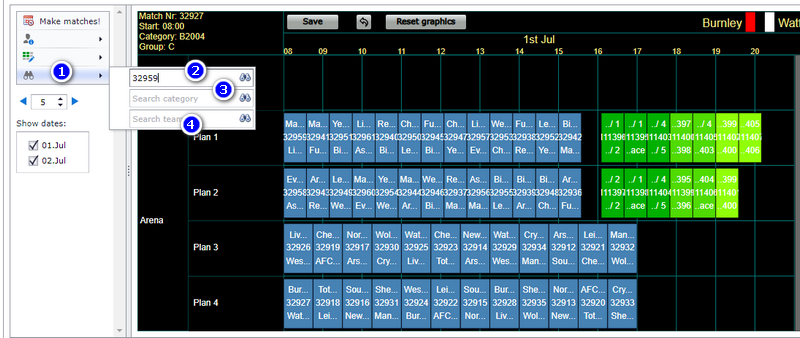
- Open the search menu shown in the screenshot.
- Search match number: enter the match number here.
- Search all matches in one or more categories: you can enter 2012, and the matches in both B2012 and G2012 are selected.
- Search team name: you can enter just part of a team name, for example "pool", and all matches for "Liverpool" are selected.
- By default, TXO uses system-made match numbers. In this case there is nothing to think about, because TXO ensures correct numbering (no two matches get the same number).
- With system-made numbers, the number of the first match is very unlikely to be 1. It can be 345 or any other number, and the starting number cannot be changed.
- With chronological match numbers, TXO gives the first match on field one match number 1 and then numbers the matches chronologically. This gives a very tidy numbering of the matches.
- The drawback of chronological numbering shows when you delete or make new matches after you have printed match cards or sent the schedule to a printing company: you then get holes in the match numbering. See the example under "Why chronological numbers can mislead after changes".
- You can switch between the two systems as you wish.
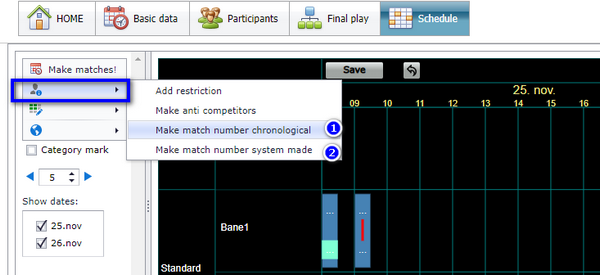
- Open the menu "Make match number chronological" to set chronological numbering. The first match on the first field gets match number 1, the match on the next field gets number 2, and so on.
- Open the menu "Make match number system made" to let TXO number your matches. The numbering can start on any number. New matches get higher numbers, so match numbers always increase when you schedule new matches.
Say you have 10 matches, numbered chronologically from 1 to 10. You print the matches and give the print to someone.
After a day, several teams are withdrawn and you choose to reschedule the matches. You delete the matches, make new ones and then make a new chronological match numbering.
Now match number 1 is likely to have different teams, field and/or start time than match number 1 on your first schedule. It is not possible to see on the print you have shared that the matches are wrong, because the print also includes a match number 1.
With system-made numbers this never happens, because new matches get new, unique (higher) numbers, and those numbers do not exist on earlier prints.
- When you choose "Make match number chronological" (item 1 in the menu screenshot), TXO keeps using chronological numbering from then on. You can switch back to system-made numbers whenever you like.
- You can also set a match number manually. Make sure you do NOT give two matches the same number.
- Setting up fields, dates, categories and the "Number of matches break" per category: see "Dates, categories, fields and match length".
- Team restrictions that produce the orange restriction symbol: see "Restrictions and anti-teams".
- Moving, switching and deleting matches once you have found them: see "Moving, switching and deleting matches".
- Building the schedule in the first place: see "Making the schedule".
- Publishing the schedule to the public web and printing reports: see "Publishing, messages and reports".
See also
Not covered here
Was this page helpful?